Thursday, September 29, 2011

Halloween cookies and recipe from Hayley @ Welcome to the Mouse House

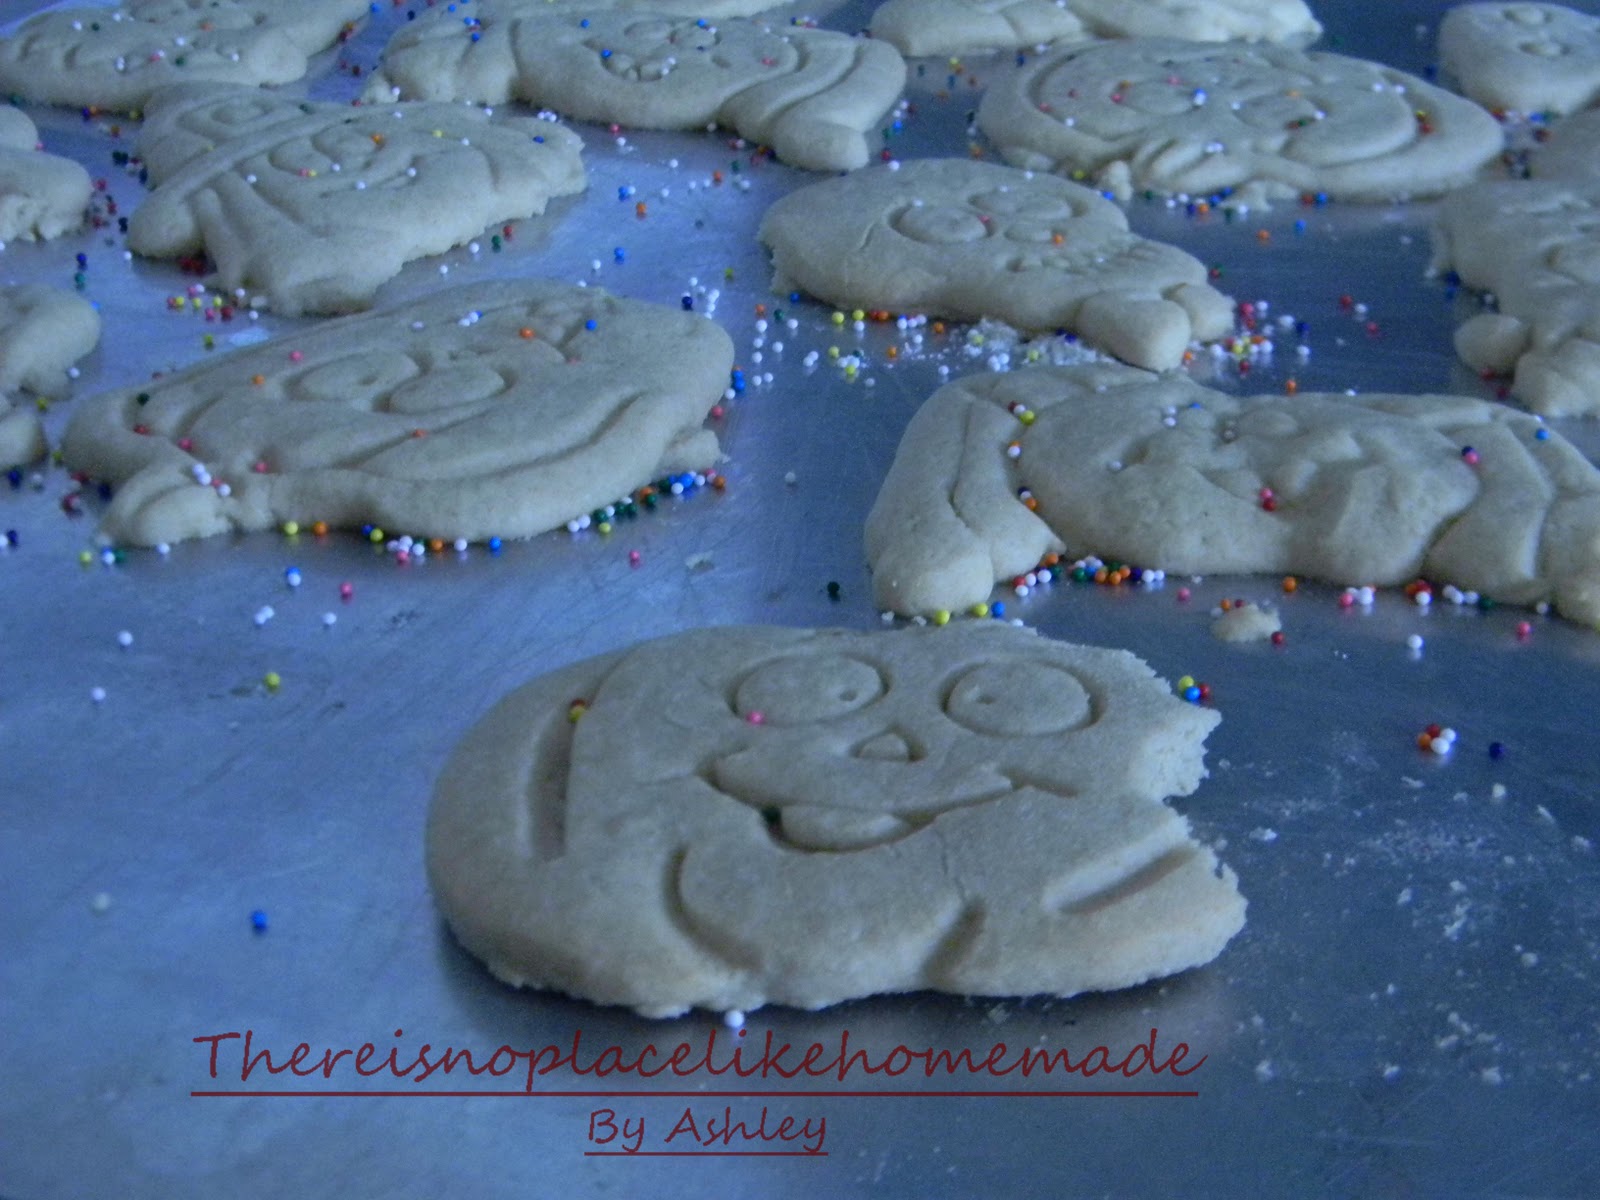
The other day will catching up on my blog reading I ran into a yummy cookie recipe from Hayley @ Welcome to the Mouse House (this is the link directly to her cookie post with recipe) It was  so yummy!   K and E really enjoyed making Spooky Halloween cookies!


These were so fun. I am thrilled that fall is here. It brings Halloween, Thanksgiving, and then Christmas! Yay! These are my favorite holidays. Soon I will have a DIY baby costume to post. I just need to finish sewing it. It is so cute! Can't wait to share with you guys. Anywho check out Hayley's blog and here delish cookies. She also has a ton of awesome diy and crafty goodness I know you guys will love! Until then happy baking!


P.S. Notice that there aren't any sprinkles on the actual cookies. Yeah we forgot to put the sprinkles on before baking. K still wanted to shake the sprinkles so I let him anyway. Sprinkles are always fun....to kids that is. I am still finding them all over my kitchen! :-@


Construction paper art and easy display!


Today K and I made fun, fall pumpkins. He is now old enough to actively use the sick glue and direct me in the look he is going for.  So after we finished I went to put them on the fridge....not happening. ;) If you are anything like me your fridge is already full of chore charts, weekly menu plans, and various art work. So plan B. I decided to add an extra piece of construction paper as a support and display them on the table. I haven't decorated for fall yet so I got 2 two birds with one stone. If you are interested I took picks along the way and have step by step instructions to share! 

Here is what you will need:
Construction Paper
Stick glue
Scissors
Pen
(or in my case my tailors chalk K insisted on using)
One creative little mind to produce awesome artwork


We set up a little snack station and started creating. He was very sure about the shapes he wanted on his pumpkins. It was so cute. He would say rectangle eyes for this one and a triangle nose for this one. My kids amaze me every day with how much they are changing, growing, and learning.


Helpful tip: When cutting out facial features trace your shape onto the cutout paper to help get the proportions right.


Here we have one silly pumpkin....glasses and mole all at the request of the little artist. I love it! The mustache mouths were moms idea....my picky artist let me have that one. When I suggested circle eyes he wasn't having it. HA!


Here is how I constructed the display support for the art. Cut out a wide piece of your construction paper. I cut from side to side and half as tall as my pumpkin. Then crease the middle.


Folded in half, cut an angle from the tip of open end up to your folded end. You just want a slight angle so it will stand up. I didn't get it in the pics but cut the angle completely off.


Then on the open end fold about a half an inch of the paper back on both sides.


Kind of like little wings. These are what you will glue to your artwork.


Dab your stick glue onto the folded flaps that are facing out in above pic.
Here is a photo of flaps with glue.


Then press flaps to the back of your art work and press well. Let dry


Ta-Da! Your done! Beautiful artwork on display. My little guys was so thrilled with his work. Every time someone comes into the house he takes them over to see his masterpiece.


Here is a side view and you can see how it  works. Very simple and easy. Plus it frees up my poor fridge. I hope you and your little artist create some fall pretties to display!

Friday, September 23, 2011

Auntie Anne's at home baking kit!

Did you know they sell an at home pretzel baking kit? Am I out of the loop? Has this been available all this time? I had no idea until the other day. I secretly jumped for joy in the store when I saw this...


I was so ready for a nice yummy pretzel that I didn't have to go all the way to the mall for. While going through the instructions I came across a thing of absolute pretzel heaven...How to make your own pretzel dogs!!!! I love those things! Now I could make them at home and a healthier version. I used turkey dogs instead of real hot dogs. We love turkey dogs by the way. It was unbelievably easy to prepare the dough. From start to oven it took 1 hour and that is with letting the dough rise for 30 minutes.


Here are my lovely pretzel dogs. My guys loved them. I made a cheese sauce and K had a blast dipping his.  Of course he had to have his own dipping bowl....he is an infamous a-million-licks-dipper. Trust me you don't want to go anywhere near dip that child has touched.  ;)  I love him to pieces but he is all boy. He can't help himself.


I had a package of 8 turkey dogs completely wrapped and still had dough left for 3 big salted pretzels, 3 sugar/cinnamon ones and one baby sugary one for E. Oh and it comes with the salt and cinnamon sugar packs.


I am sure it isn't brain surgery to make your own pretzels from scratch but I really like this because it took all the guess work out of it.

So if you haven't seen this in stores yet and love Auntie Anne's pretzels you should grab a package. Happy eatting! ;)

Thursday, September 22, 2011

Karen's Italian Wedding Soup

Karen from Little Red House Designs blogged about her homemade Italian Wedding Soup. One look at that soup and I knew I had to try it. It was AMAZING! Here is the finished product...


Here is the link for Karen's post on how to make this scrumptious soup Karen's Italian Wedding Soup

Now in her recipe she says you can use any homemade meatballs. So I used my chicken meatballs. I thought I would share that recipe with you guys. They are supper easy and very versatile. I use them for spaghetti, meatball subs,  Swedish meatballs, and now Italian Wedding soup.

Chicken Meatballs
1 pound Ground chicken
1 cup shredded mozzarella cheese
1/4 shredded Parmesan cheese
1 cup breadcrumbs
( I prefer to make my own but the choice is yours)
1 egg, beaten
Any Italian seasoning you like - about a teaspoon or so
(this is to your liking..I usually just do some oregano and fresh sweet basil)
Kosher salt & pepper to taste
Optional..Chopped Roasted Red Bellpeppers

Mix all ingredients in a bowl (I use my hands here) Form into meatballs and lightly brown on all sides in a shallow pan with a little cooking oil.  I use canola, and then slow cook in sauce or soup of your choice. You could also bake these...I am unsure of temps and time but I am sure it is possible. Whichever method you choose make sure they are done...they are chicken after all. I prefer mine cooked low and slow in sauce or soup. These are great in the crock pot (browned first of course). They are so tender and filled with cheesy goodness.

I will note this about the soup....Karen warned me. She said to make sure to make the meatballs on the smaller side. I think I still made mine to big. Next time, for the soup, I will only use a little over a half a teaspoon for each meatball. Oh and because I love spinach I added extra to my soup. Horrible secret.... I have had it for lunch and uh...breakfast for the last two days. Isn't that horrible... breakfast. I couldn't help myself. LOL It is SO GOOD!

So thank you Karen for sharing an awesome recipe! Everyone should check it out and her blog. She has some really yummy recipes. ;) 

~Linking up with~


Tuesday, September 20, 2011

Old furniture gets a new look!

I have been feeling like my house needs a face lift lately. Being a stay at home mom I try to save where we can so I got creative. We bought an older home that needed a lot of work so we painted our whole house (literally...even the ceilings). Needless to say we have a lot of indoor paint leftover. We have been handed down some older unwanted furniture. They weren't exactly our style so I spruced them up a bit. Here they are....


I carried everything into the garage and went to work. Carefully I removed any hardware and gave them a good scrub down.  Then proceeded to sand the heck out of them. Luckily we have an electric sander...it really helped me out.


Once they were all sanded I gave them one final clean and then a couple coats of paint. Now I should have used primer here but we were fresh out. I was trying to use only the things we had on hand. It worked just with an extra coat or two. I also spray painted the old brass handle for the drawer.


And Viola! It is amazing what a fresh coat of paint can do. This is now in our dining room. I am still playing around with the pretties on top of the little stand but I think it has found it's home...for now ;) I filled the open cubby of books for the boys to give them something to do while waiting for dinner. I also utilized the drawer for printer and photo paper. I really love this piece now. The paint on this is Gentle Rain by Behr. There are 2 rooms in my house this color and I can't tell you how calming this color is. I love it!


This next piece is just a small bookshelf that will most likely hold some of my fabric in my sewing room. It will be bare for a little while until I finish redoing the sewing room. I don't know why but lately I feel like overhauling my whole house. And it feels good to see progress. This color is a color I used in the nursery for the sky on the Dr. Seuss walls it is called... Blue Marine by Glidden. My sewing room colors are different shades of blue, turquoise, and a plum purpley color. I was walking in target and saw a pillowcase on clearance that spoke to me. Those were all the colors in the pillow case.


So the next time you come across an unattractive piece of furniture in your home give it a second thought before tossing it out. You never know it could be a real gem. ;)

Faux Chenille is in the air~~~

Faux Chenille is in the air right now. Especially among my favorite sewing mamas (you know who you are). I had long ago decide to jump on the band wagon. I have had all this fabric set aside for about 6 months just waiting to be put together. I actually swore I would never make one again after my wild adventures over a year ago with my first faux blanket. That was on my old machine. My new one handles it perfectly and now I don't mind sewing them.

It all started with this Spaceman flannel that K saw in the fabric store one day.He found it in the remnant bin and would not leave the store without it. So i decided to pick up some other flannels while I was there and make a soft, cuddly faux chenille blanket for him. Now that E is much more independent I was able to get it all put together.

I spray basted all my layers and went to town sewing all my layers. If you aren't familiar with a faux chenille blanket or how to make one I am going to include a few links to help you with creating your own. I would have but seeing as I made mine here and there I didn't take the proper photos for a tutorial. Here where I first learned of the blanket .... Aesthetic Nest and here are a couple others ..  MADE and Mercys Mom. All wonderful tutorials!


Don't you just love the soft glow of a sewing machine light.....ahh, I do. ;)
 Now if you aren't familiar with the faux chenille technique I will try to explain a little. You sandwich 4-5 layers of cotton or flannel fabric (you will need a fabric that will fray). Use a good spray baste to make sure your layers stay together. Mark a center line diagonally across your fabric and begin to sew down that center line. You then go out about 1/2 an inch and continue to sew lines parallel to the center diagonal until you have covered the whole blanket with the lines. After you have finished sewing you cut in between all the lines making sure to only to cut the 3or 4 layers of flannel or backing. You do NOT want to cut the front. Also be careful when cutting in the channels because it is easy to catch the front fabric.  


After you are done with all your cutting, square up your blanket, bind it and throw it in the wash a couple of times. You will come out with one of these little beauties!I love how it turned out. The colors worked perfectly together. Plus my boys both love it and all its cuddly goodness.


Here is a close up of all the frayed goodness on the back. It is oh so soft. It completely warms my heart to see one of my little guys dragging this thing around. I  love it when they like what I have made for them.


Here is the first Faux chenille blanket I made. It was for a friends little girl. I could not find the right combo of flannel at the fabric store for this one.  I purchased a package of coordinating receiving blankets that matched perfectly. 


Now fall weather is creeping up on us and these little cozies are just the ticket. Whip one or two or 10 for the little warm loveys in your life!;) Happy Sewing!

Monday, September 19, 2011

Thank you Followers!

I just wanted to say thank you to all my followers. I never thought anyone would take an interest in what I had to say or contribute to blog world. So I am very thankful for all my wonderful followers. In the past few days I have a gotten a few more and just wanted to make sure you all know that I appreciate you! :)
Related Posts Plugin for WordPress, Blogger...