Thursday, May 23, 2013

Bookbinding Away!

I am still here!!! Just busy, busy.:) Books are all coming together and will be ready for the shop really soon. Here is a sneak peek of what I have been up to.

This first picture is an something new I am trying. I will post about it if it turns out how I want it to. Heck, I will post about it if it flops too. Maybe someone else might find my mistakes helpful or just want a laugh. Haha!
 
 
Mini jotters! I love these. They are perfect to stick in a purse or diaper bag. They would probably even fit in your pocket. Perfect for on the go.

 
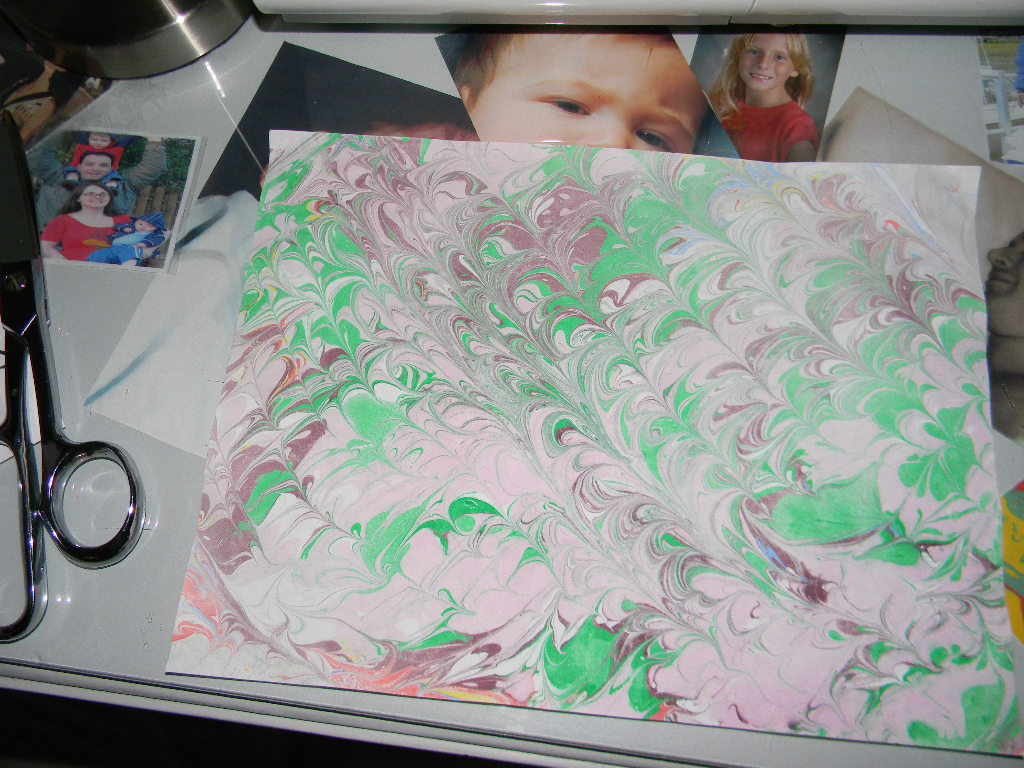
I have been busy with book cloth! I only have a shot of one of the book cloths but have four others in the works. This one is a super soft wool linen blend that I absolutely adore!


The newest binding technique which is also my favorite now. :D  A hardback pamphlet bind. I am over the moon for the look and how nice these work up. I need to get proper pictures but it was too pretty not to share. I hadn't seen this technique before I stumbled across a wonderful blogger and youtuber while doing some binding research. Lee from Crafty Loops has some AH-MAZING tutorials on book binding and all sorts of fun crafts. Crafty Loops You Tube Channel She is so very sweet and helpful. Thank you Lee for your kind words and awesome tutorials! I swear she is as sweet as her Irish accent. :)
 
 
Alas, I have also been doing some sewing!! I have a few more sewing projects but I need to get photos. I swear not enough time in the day. Between two boys, starting preschool homeschooling, preparing for the shop, everyday life, most days I am not sure if I am coming or going.


Hoping all this work pays off when the shop opens!
 
Linking up!
 
 
By Stephanie Lynn


Inspire Us Thursday at Organized 31

Wednesday, April 17, 2013

Vintage Floral Case Bound Journal


Today I finished this little case bound journal. I am in love with the fabric that I used to make the book cloth. It is a beautiful linen.  Who doesn't love a vintage floral print! :)


For the cover paper I decided on a bit of my hand marbled papers.

 
The paper is Mohawk superfine. I love this paper! It is hand torn by me so it has a nice soft edge.


So happy with how it came out. I know I have said it before but I really love bookbinding. I hope this little book brings as much happiness to it's new owner as it has to me.:)
 
Do you have a craft or hobby you are passionate about? If so by all means share. I would love to hear about it!

Saturday, April 6, 2013

Ultimate Blog Party 2013 !!!

Ultimate Blog Party 2013

Hi all and welcome! My name is Ashley and I am joining the Ultimate Blog Party 2013 hosted by 5 Minutes for Mom! I am so happy to be a part of such a wonder gathering of blog goodness. I partied along last year as well and met some wonderful new people. So a little about me....Well this years marks a new for many things including my blog. So of you may have know it under a different name. My blog up until recently was known as There is no place like homemade. Recently I felt the need for change and for a new chapter with my blog which included the name change. Not that I didn't love where I started from but things change and we change.:) My family consist of one Mr. Wonderful and two cute, crazy little boys, K & E. I am a stay at home mother who loves to craft in her spare time.  Spare time is hard to come by here but when I can I love to sew, book bind, crochet, dabble with paints, marbling....you get the picture. Haha! A lot of crafts! We are boarding a new adventure as well. Homeschool is on the horizon so you may see some post from time to time on our path through the in & outs of a newbie homeschooling mom and her two boys. Hope you enjoy reading! Here's to new bloggy friends!

Friday, April 5, 2013

Craft Table and Mini Craft Room Reveal !!!


Hi all! I know i have been promising a craft room reveal for a long while now. I think over a year to be exact. Honestly it still isn't finished and I am not sure that it ever will be. It is ever changing with my ever changing adventures. Haha! I did take some pictures so I decided to share a peak. These room pictures weren't intended for a room reveal so please forgive the fact that everything still isn't perfect.
 
I was in need of some major storage so Mr. Wonderful decided to give me a crash course with some power tools. Now I know how to use most of the but to completely honest the ones with blades scare the bejesus out of me. :D He helped with the top and the rest was done by yours truly. I was so proud of myself when it was finished. Of course I still asked him a bazillion questions but I did all the physical work. It is no where even close to perfect but I love it! I may have cut the shelves wrong and put them in backwards or messed up a pilot hole or two but I got the job done, finally. Oh and this table was based loosely off of the craft table on Anawhite.com. She has tons of amazing plans. I plan to practice some more with my woodworking skills and her wonderful plans.


Because I am such a newbie to working with wood I purchased two small bookshelves. I found these at target. While they weren't in the plans exactly they worked for me.  I wanted things open and easily accessible so I left the front shelves open and added extra support underneath them. It is wonderful to have such a large work surface. it will come in handy cutting fabric and using for my bookbinding. The shelves were more than sufficient for my storage needs. One side is dedicated to fabric and the other my bookbinding supplies. I need to make spool holder for the embroidery thread and then that shelf will be used for bookbinding supplies. Oh and did i mention Mr. Wonderful surprised me with an Embroidery machine!!!He really is my Mr. Wonderful.:)


I found these cute tiered stands at Walmart on clearance for 3 bucks! I knew they would be perfect for storage so I snagged a  couple.:) I found the adorable little buckets in the dollar section at Target. I couldn't resist them and bought a few for me and a few for the boys. 


Everything was moved around to house the large table. My sewing table found a new home under my pretty Cocoa Cola ladies. You can also spot a certain little someone trying to convince me to take the gate down so he can meddle.


I still need to find another solution for the computer/book station but this will work for now.  The table is quite short. Maybe some leg extensions.  I was marbling excuse the mess in the floor.

 
And last but not least I bought a folding table to house the new embroidery machine. I have shared it before but you can also see my scrap storage on the back wall. Shoe cubbies are wonderful for scrap fabric.:)

 
Here is a blast from the past of my humble sewing beginnings. I started in the closet in the room. It was the spare room with a craft closet.  Fast forward 4 years and it is a craft room with a spare bed.;)
 

Excuse the mess in this pic....I am sure I was mid project and we all know how messy creativity can be.:)
 
Hope you  enjoyed reading and  found some inspiration for things on your to-do list!


Linking Up!
 
TDC Before and After 

Becoming Martha

Friday, March 29, 2013

I LOvE working with paper!!

 
I have always had a love for books but I had no idea how soothing making them would be. I am seriously in pure heaven while working with the. This is my first Coptic bound journal. I really love how it came together and I really learned a lot in the process. I think when you are making anything the best advice is practice, practice, practice. We really learn a lot from our own mistakes and only get better.


I have been dabbling in hand marbled papers. This paper below on the inside cover is one that I made using a methyl cellulose and acrylic paint method. It is so very magical to put the paint in the tub and then see it transfer in the most amazing pattern on the paper. :) i am also trying a Japanese technique called Suminagashi that produces striking marbling when done the right way. i need to work on that one some more. Not quite striking yet! Haha!


Mr. Wonderful and I had a time fight some materials I had at home trying to make my book press but failed miserably so I took some advice from SeaLemonDIY and her wonderful youtube videos and used cutting boards. Brilliant!! They work like a charm!

 
Tonight i am just finishing up some fun, colorful drawing pads to tuck into K and E's Easter baskets. I really hope they enjoy them. They both really love to draw and are very excited to have their own books and such. We are venturing into homeshool so K really feels like a big boy doing preschool work. Maybe I will make him a full sized notebook for "school".:)


Hopefully opening the shop in Etsy soon!!! Hope everyone has a wonderful Easter holiday!!!
 
P.s. Sorry for the less than stellar photos. Working after bedtime = no great lighting. i am sure all you mommy crafters know exactly what i am talking about! LOL

Wednesday, March 13, 2013

A fresh breath of change! :)


Hi all! I have been absent for quite some time. Wow, I can't believe how long it has been. I have been busy with family and normal life and to be honest had to much on my plate. It was becoming a chore to accomplish all the things I once loved. I took a break from everything. It was much needed. I think I got so wrapped up in everything that I lost sight of my passion. Some changes are definitely in order. Big changes! I can only hope you guys will stick with me throughout the change. i am overhauling everything. There is no place like homemade is getting a whole new look and even a new name. A shop in Etsy is underway as well!!! EEEKKK! I am so excited! I can't wait to share all my work with you guys. New craft ventures are also underway. From a very young age I was mystified by books. I LOVE everything about them from the way they feel to the way a new book smells. LOL Yes, I know I am a dork.:) It's ok to be different.;) In elementary school I would pass up recess and free time to help in the library! So when I mean young age I mean young. By now I am sure you have an idea of what one of the new ventures is. If not here are a few photos to give you an idea.


I am so excited to be bookbinding!!! Books really are a passion for me. I have also taken an interest in the marbled papers you see inside of a book cover. I am trying a couple methods to make my own papers. So far I have used a method that involves floating acrylic paint on methyl cellulose. I am getting the hang of it. I have some pictures to share.


There is one more marbling technique I am dying to try. The supplies are being shipped as we speak.:)  Suminagashi. It is a Japanese ink marbling technique that dates back centuries. It is believed to have originated in Japan around the 12 century. It is a beautiful art form i hope to master. Here is a link for a youtube video showing you the Japanese marbling technique...Suminagashi Video Link The man in the video has me in awe. I will probably never be close to even have the skill level that this man has. I would love to see him in action and watch him work.
 
Ready for the reveal of the new name!!  So the new name is going to be  Paper to Thread!! I am so excited for this change! So if you see Paper to Thread and don't recognize it on your blog roll it is me!
 
Hope to get everything changed over soon!
Have a great day everyone!
 
Linking up!


Monday, October 8, 2012

Quick, Easy, Cute Halloween Wreath!

 
Happy fall everyone!! It is that time of year again! My favorite. I love the fall. Halloween, Thanksgiving, Christmas, cool weather, warm coco, and fuzzy socks. Mr. Wonderful and the boys picked up some pretty, glitter covered pumpkins for the font door. We put out all our other spooky decor out but still felt something was missing. A wreath of course! Our door looked so lonely and empty. I remembered seeing some pretty, colorful garland at Publix and had an idea.

 
This is what you will need.^^ A wreath. Any kind will do. I used an old yarn covered wreath. Two different colored strands of Halloween garland. Also for fun factor a bright colored length or ribbon for a pop.
 
List:
Wreath
Halloween garland (2)
Ribbon
(long enough to hang from you your door and wrap around the wreath)
 
 
This garland was so cute. Black and white skulls, and purple and black witches.


So start by wrapping your garland around your wreath leaving only about an inch between each strand. You want it nice and full. When you get to the end of your garland just tuck and wrap the end. My garland was a bendable wire garland. Don't worry if yours isn't simply tie a good knot to secure the end. Then you take your second garland and wrap it in between the spaces of the first strand. finish the ends just the same.
 
 
When you are finished wrapping you should have something like this picture below. Almost done! See I told you quick and easy.:)

 
Lastly you slip knot your ribbon around your wreath and hang.
You can have any type of hanger on either side of your door. I personally have an upside down command hook on the inside of my door. I just bring my ribbon up and over the top of the door and tie it around the hook on the other side. I have a picture of this from my Christmas wreath tutorial just scroll down the page Here.


Viola! Quick, Easy, and if I do say so myself, cute Halloween wreath. I hope you all have a spooky Halloween!! Happy Fall everyone!


Linking up!!
Skip To My Lou
 
Grab a button!
Spotlight Saturday
I Heart Nap Time
Related Posts Plugin for WordPress, Blogger...